Find Missing Files and Folders
What is it
Suppose you created a CD or DVD with drag and drop software (e.g. Direct CD, InCD, VOB Instant write, BHA B's gold, Packet CD, DLA, ...) and you come to the conclusion that suddenly part if not all data is gone. Or you just deleted a file and suddenly realize you want the file back. Or Windows says that your USB stick is unformatted. Or the CD or USB stick was formatted in a Mac. In any of these and many more sitiations this function of IsoBuster might be a life-saver !
A scan for missing files and folders can do wonders, no matter the medium nor manner in which the data was put on the media.
How
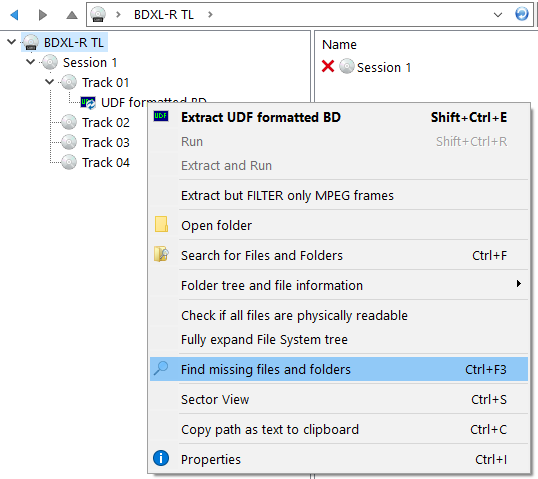
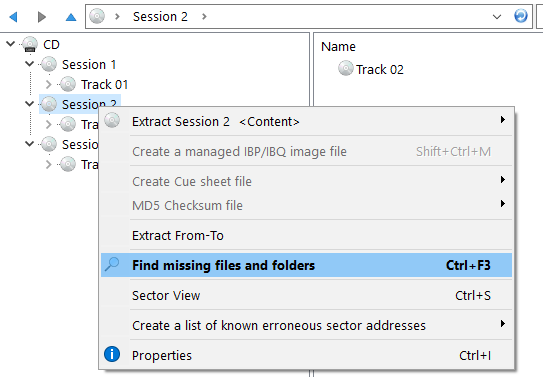
Select the Session or Partition where you lost the data (typically that is the last session or partition), and select "Find missing files and folders". This means, position the cursor on the session or partition icon and right mouse click. See screen shots for examples : (You can actually also start this test from the CD/Device icon, a Track icon or a File System icon)
What happens
When you select "Find missing files and folders" IsoBuster will prompt you with the question to create a managed image file first. That is unless you told IsoBuster to not prompt you anymore. To change that setting, check here. A managed image file can be a great tool because you only need to sit through a possibly painful long wait once. Bad or damaged disc which are hard to read can take a long time to scan through. So by making a managed image file first, you actually copy all data to a special file on the hard drive and next work from there. So you only need to sit through the long wait once, after that is houndreds times faster. If you were prompted to make the image file and you clicked yes, then the image file will load automatically after creation and the scan will start on the managed image file. Creating a managed image file is great for optical media, has plenty of advantages for Flash Drives etc. but is likely less useful for Hard Drives.
If you are more experienced and already made a managed image file first, just load that file and work from there. E.g. start the scan "Find missing files and folders"
If you are not working from a managed image file please read this
Before you start scanning the disc you might want to consider to change the Read Retry count. Do this based on your experience with the optical drive you're using, for other media it may be best to leave the default setting. E.g. if scanning takes a loooooong time you could abort and restart with a much lower retry count. IsoBuster however will also automatically apply a smart retry managing scheme to get to the best result. You should know however that IsoBuster internally also reduces retry counts based on the type of errors and various conditions so usually IsoBuster does this work for you already.
Action
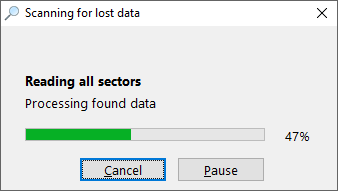
The moment you select "Find missing files and folders" IsoBuster will read all sectors in the session or partition. During this full surface scan IsoBuster will try to find missing files, using a variety of different techniques. The recovery action exists in three steps:
- First, already found file systems (such as UDF) are fully explored to reduce finding files twice.
- Next the entire surface is read and all relevant data is stored in memory.
- Finally all that data is processed and in worst cases still some more media access is required during that action.
Now what
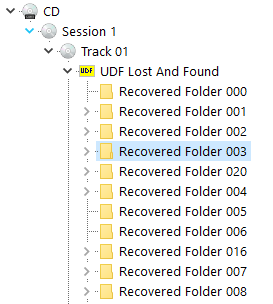
When the recovery process has ended, and with a bit of luck, IsoBuster will have found lost and/or deleted files and directories. Files and directories linked in the 'Lost And Found' root will have no name because the name was unretrievable, these files and directories are orphans. Files and sub-directories in these 'unnamed', 'lost' or 'orphaned' directories will have their original name again. Orphaned files will be named "Recovered File" and orphaned directories will be called "Recovered Directory"
IsoBuster has a unique feature that scans all the orphaned files' content and tries to determine what the file extension is. E.g. this way, and with a bit of luck, you will be able to distinguish .bmp, .gif, .jpg, .wav, and many other file types.
This feature can be turned off.
UDF data found
A
 B
B 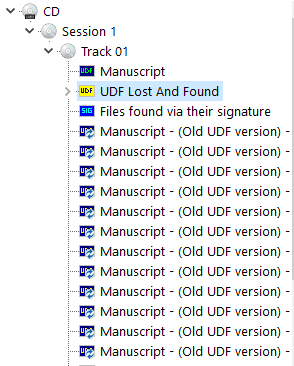
The yellow
 'UDF Lost And Found' root directory will be linked to a track icon in the selected session (left pane). You can change a name (e.g. 'Recovered Directory 01' to 'My Pictures') by selecting that object (file or folder, e.g. 'Recovered Directory 01') in the list view (the pane on the right) and by clicking once on that object or by hitting F2. (try it and you'll see).
In case you did the recovery action on sequentially written media (e.g. what Drag and Drop applications do on CD-R, DVD+R and DVD-R (some apps also allow to do this on Rewritable media)), you will notice that IsoBuster also found all previous UDF file-systems. The previous file systems show an old version of the files and folders.
 This means that you can get back an old layout of files and directories, or this way you can get back to an old version of a document you have edited a few times already. This option offers lots of possibilities ... .
In case such older UDF file systems are found, they are attached with a blue UDF icon
to one of the track icons of the selected session. They are also marked with ' - (Old Version) - '.Files found based on their signature
Similarly to the "UDF Lost and found" there will be a list of files found via their Signature. This list (blue icon attached to the track icon
 ) may contain the exact same files as the "Lost and found folder". These files are simply found via an entirely different mechanism and hence you are offered an alternative for when one of the mechanisms is not yielding to results.
DVD Video
If you ran the scan on Video and/or Audio DVDs there might be an extra AUDIO / VIDEO folder as well listing found IFO/BUP and VOB files
 . Additionally this folder may feature the different recordings you did on +VR(W) media and/or the different AUDIO recordings/tracks.
Extract recovered files
To recover found files and/or directories, just extract as you would normally extract a file or directory with IsoBuster. Right click and choose Extract (the first or top option of the popup window). The screen shot shows found files and directories.
Errors
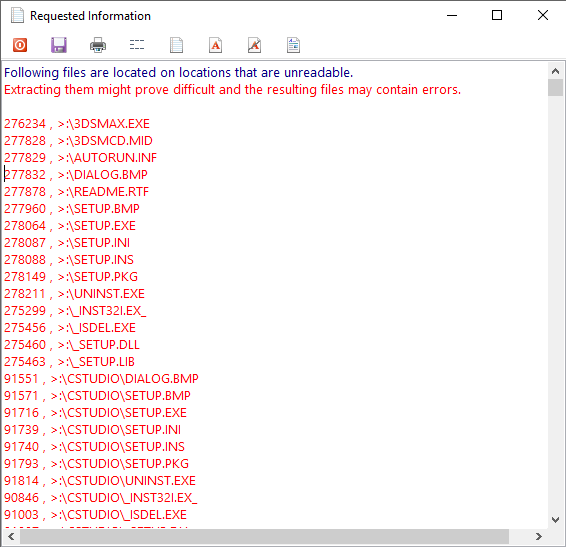
If IsoBuster detects errors during the scan, those sectors are marked. After the scan and if files are affected by errors (e.g. the files are located in erroneous sectors) IsoBuster generates a list of all files that are affected. You can edit, save, print, ... this list.
IsoBuster will also use the scan information to add an 'error' icon
 next to every file which is affected and which is likely to be corrupt if you try and extract the file.
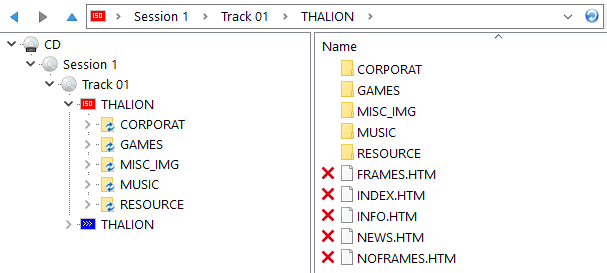
Also check these great online resources targetting specific but related tasks:
How to recover VIDEO data from a DVD with IsoBuster.
How to re-create a DVD from the full set of VIDEO_TS files on my hard drive.
How to re-author a DVD from one or more VOB files on my hard drive.
How to re-create a DVD from one or more VOB files on my hard drive.
How to fix a damaged video stream so that it can be played again.
Remove Scratches from CD or DVD compact discs.
Quick erased CD-RW vs. DVD-RW vs. DVD+RW, what's recoverable and how.
Using Sector View in search for missing files.